Hello Friends,
Today I'm back with another tutorial. I saw a picture in Pinterest of a card few days back and wanted to try it. So here is that card which I made after seeing that. Later thought of making a tutorial on it and here is the tutorial of this Z Fold card.
 Z Fold Cards
On 17th August we are celebrating Raksha Bandhan so I made these 2 masculine cards. Raksha Bandhan is a festival of Brother and Sister's lovely relationship.

On 17th August we are celebrating Raksha Bandhan so I made these 2 masculine cards. Raksha Bandhan is a festival of Brother and Sister's lovely relationship.

Step by step photo tutorial
Step 1 - Cut a 12'' by 5'' from black cardstock. Now score it at 3 and 6 and fan fold it.

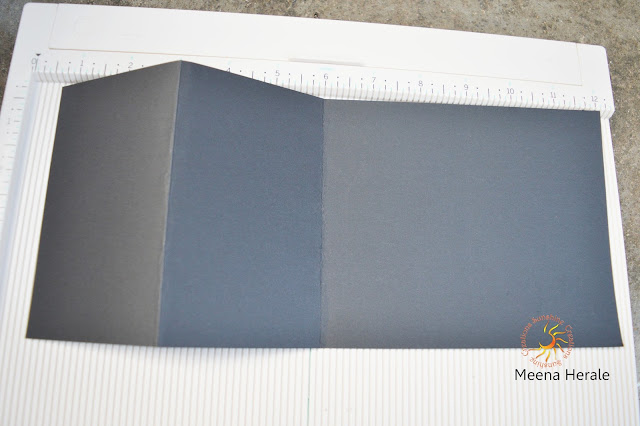

Step 2 - Cut another piece og measuring 12' by 1 1/2'' from black cardstock. Now score at 6 and 9 and fan fold it.


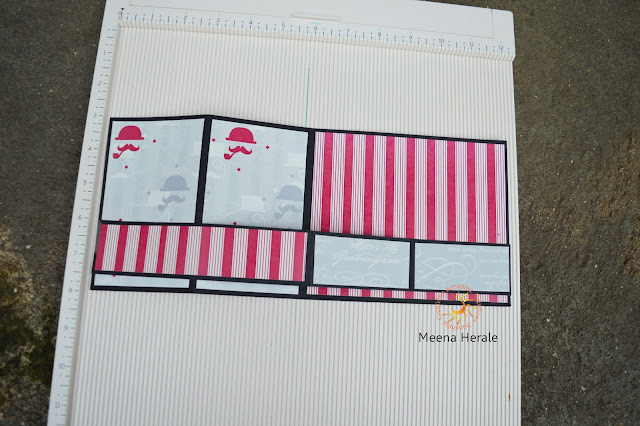
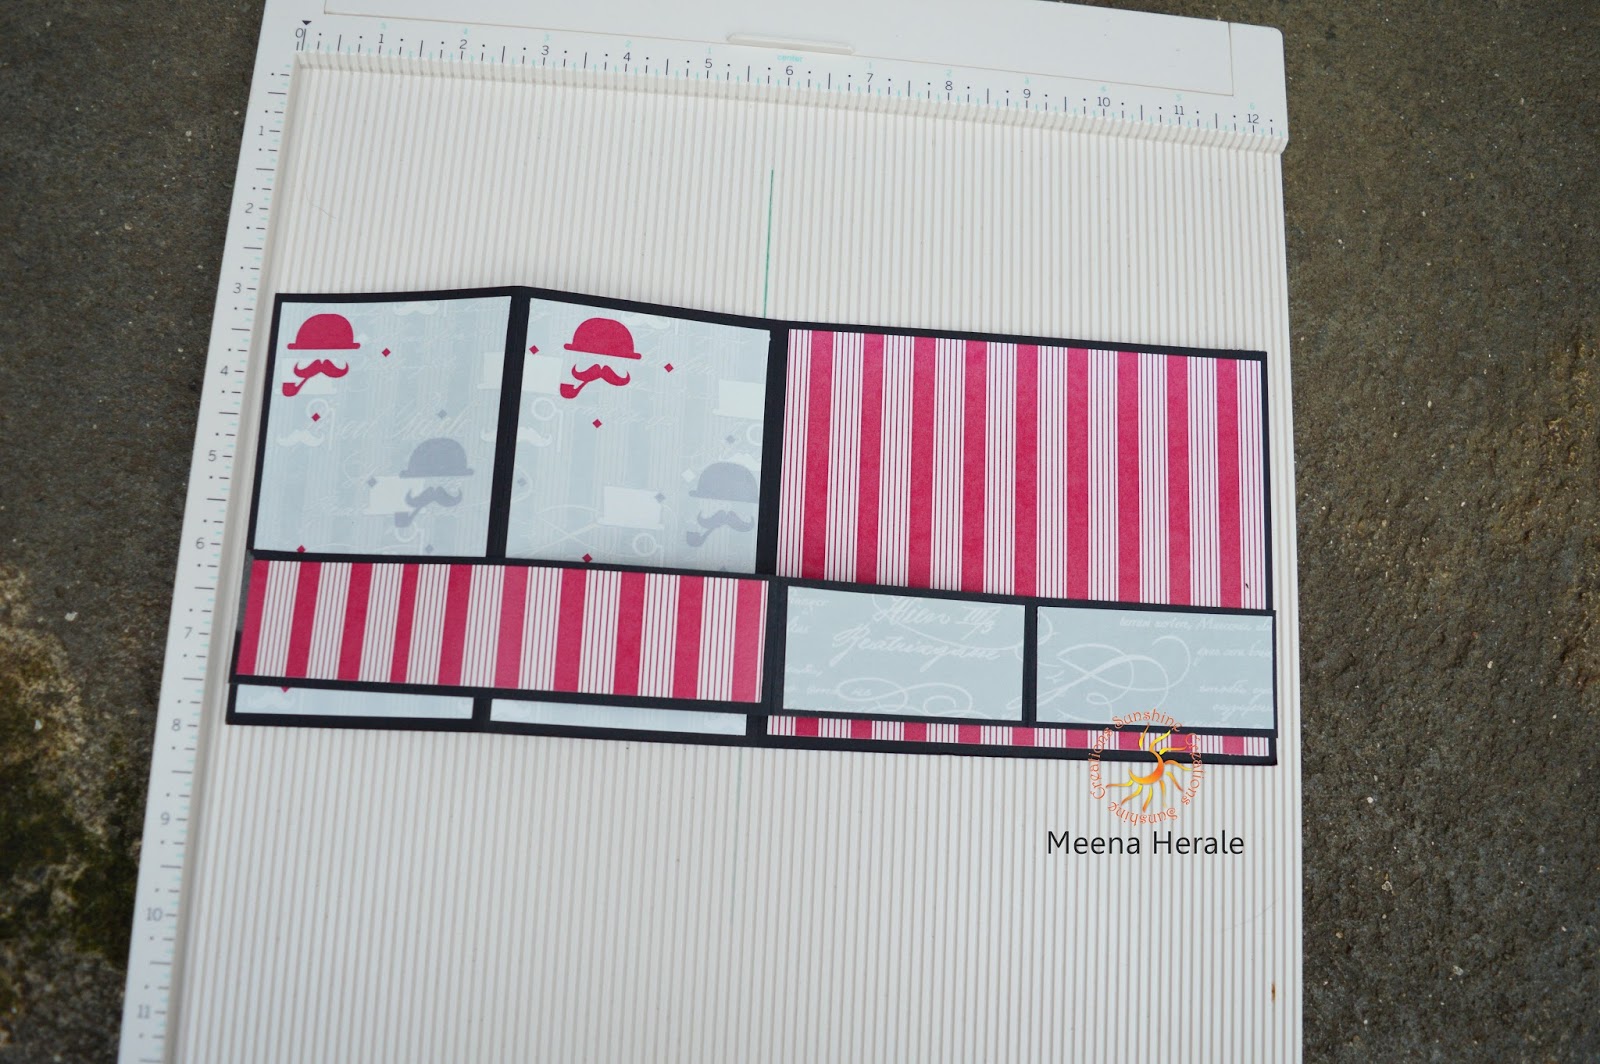
Step 3 - Now cut pattern paper little smaller then the black cardstock and glue them on black cardstock. Here I used The Gentleman collection from Papericious.

Step 4 - I embellished the cards with die-cuts and circle collage sheet from Papericious.


Finally the cards are ready.


Hope you liked this tutorial.
If any doubts then feel free to ask.
Suplies - Black cardstock,
The Gentlemen collection from Papericious,
Red tracky tape,
Circle collage sheet from Papericious.
Linking to -
Paru's Cardmaking Challenges August - Family
 Simon Says Stamp Monday Challenge- Celebrate
Pixies Snippets Playground Week 241
Happy Crafting
Step 1 - Cut a 12'' by 5'' from black cardstock. Now score it at 3 and 6 and fan fold it.


Step 2 - Cut another piece og measuring 12' by 1 1/2'' from black cardstock. Now score at 6 and 9 and fan fold it.


Step 3 - Now cut pattern paper little smaller then the black cardstock and glue them on black cardstock. Here I used The Gentleman collection from Papericious.

Step 4 - I embellished the cards with die-cuts and circle collage sheet from Papericious.


Finally the cards are ready.


Hope you liked this tutorial.
If any doubts then feel free to ask.
Suplies - Black cardstock,
The Gentlemen collection from Papericious,
Red tracky tape,
Circle collage sheet from Papericious.
Linking to -
Paru's Cardmaking Challenges August - Family

Pixies Snippets Playground Week 241
Happy Crafting
Oh Meena, these are fabulous and so kind of you to show us how you made the fancy folds too! Really clever and one I'll be trying out.
ReplyDeleteHugs
Di xx
Thank you very much Di :) Will be wating to see your card Di
Deletehugs
I'm sitting here making one right now! Your tutorial is so easy to follow - thank you Meena!
DeleteHugs
Di xx
Ahh....wow....waiting to see your card Di...
DeleteHugs xx
It's scheduled for Friday Meena! I don't have your email address or would send you a sneak peek :)
Deletexx
I can't wait till friday....please mail me, would like to see the sneak peek.
Deletemy id is kmmeena19@gmail.com
Your cards are so awesome! Thank you so much for sharing with us at Simon Says Stamp Monday Challenge.
ReplyDeleteThank you very much Meihsia :)
Deletehugs
What a beauty...you have pulled off the masculine theme with such ease and Thank you for sharing the Tutorial
ReplyDeleteWill pin it to my pinterest board to send you some more traffic
Cheers
Dr Sonia
Thank you so much Sonia :)
Deletehugs
What a great 'fold' on this card Meena - its so simple yet very effective. Thanks for the tutorial
ReplyDeleteBlesings
Maxine
Thank you very much Maxine :)
Deletehugs
Such a lovely card..
ReplyDeleteLove
Richa
Apaper-palette.blogspot.com
Thank you very much Richa :)
Deletehugs
Hi there, just popped over from the Snippets playground. Wonderful cards Richa, and a great tutorial. Thank you very much. Lynn x
ReplyDeleteHi Lynn, thank you very much visiting. I'm Meena dear not Richa :)
DeleteHugs xx
I'm always on the look out for new card shapes and this shape at first glance looks quite complicated with a lot of cutting. Your lovely clear instructions though show just how easy it is. Definetly one to try out. Hugs Mrs A.
ReplyDeleteThank you very much Mrs A :)
DeleteHUGS
Super cool masculine cards dear.! And a gr8 tutorial.! TFS :) <3
ReplyDeleteThank you very much Riswana :*
DeleteHugs
This is really awesome ! I am a sucker at masculine creations and totally loved the tutorial !
ReplyDeletecheers
happymomentzz.blogspot.in
Thank you very much Sharada :)
DeleteHugs
What a great tutorial thanks for sharing!!
ReplyDeleteThank you very much Lisa :)
DeleteHugs xx
What a fun card! Awesome tutorial!Thanks so much for playing Paru’s Card Making Challenges
ReplyDeleteThank you very much Paru :)
DeleteHugs xx
Awesome fold and love how you've decorated your masculine cards. Thanks for going to the trouble of making a tutorial!!!
ReplyDeleteThank you very much Kate :)
Deletehugs xx
Hi Meena, two great cards for your special festival, love the subtle differences, this is such a simple and fun fold I've tried a couple recently too. Have a great week... Megan
ReplyDeleteThank you very much Megan :)
Deletehugs